Thursday, April 5, 2007

Understanding Processor Architecture: RISC versus CISC

Popular processor designs can be broadly divided into two categories: Complex Instruction Set Computers (CISC) and Reduced Instruction Set Computers (RISC). The dominant processor in the PC market, Pentium, belongs to the CISC category. However, the recent trend is to use the RISC designs. Even Intel has moved from CISC to RISC design for their 64-bit processor.

CISC systems use complex instructions. For example, adding two integers is considered a simple instruction. But, an instruction that copies an element from one array to another and automatically updates both array subscripts is considered a complex instruction. RISC systems use only simple instructions. Furthermore, RISC systems assume that the required operands are in the processor’s internal registers, not in the main memory. It turns out that characteristics like simple instructions and restrictions like register-based operands not only simplify the processor design but also result in a processor that provides improved application performance.

Several factors contributed to the popularity of CISC in the 1970s. In those days, memory was very expensive and small in capacity. Even in the mid-1970s, the price of a small 16 KB memory was about $500. So there was a need to minimize the amount of memory required to store a program. An implication of this requirement is that each processor instruction must do more, leading to complex instruction set designs. Complex instructions meant complex hardware, which was also expensive. This was a problem processor designers grappled with until Wilkes proposed microprogrammed control in the early 1950s.

ISA-level
Figure 1. The ISA-level architecture can be implemented either directly in hardware or through a microprogrammed control.

A microprogram is a small run-time interpreter that takes the complex instruction and generates a sequence of simple instructions that can be executed by the hardware. Thus the hardware need not be complex. Once it became possible to design such complex processors by using microprogrammed control, designers went crazy and tried to close the semantic gap between the instructions of the processor and high-level languages. This semantic gap refers to the fact that each instruction in a high-level language specifies a lot more work than an instruction in the machine language. Think of a while loop statement in a high-level language such as C, for example. If we have a processor instruction with the while loop semantics, we could just use one machine language instruction. This explains why most CISC designs use microprogrammed control, as shown in Figure 1.

RISC designs, on the other hand, eliminate the microprogram layer and use the hardware to directly execute instructions. Here is another reason why RISC processors can potentially give improved performance. One advantage of using microprogrammed control is that we can implement variations on the basic ISA architecture by simply modifying the microprogram; there is no need to change the underlying hardware. Thus it is possible to come up with cheaper versions as well as high-performance processors for the same family of processors.

References

  • Guide to RISC Processors for Programmers and Engineers by Sivarama P. Dandamudi, Springer (2005), ISBN 0-387-21017-2.


Tuesday, April 3, 2007

ASEM-51 step-by-step Installation on Windows XP

Last time I wrote an installation for ASEM-51, a two-pass macro assembler for the Intel MCS-51 family of microcontrollers, using the batch file INSTALL.BAT. For someone who do not like anything that is running automatically, or things are not quite clear, here is an step-by-step installation guide for ASEM-51.

The files we require are ASEM-51 v1.3 for DOS/Windows (599 kB) and a collection of the latest MCU files (188 kB).

1. Create a new directory on your harddisk, e.g. C:\ASEM51 and unpack all files of the ASEM-51 package into this directory (see Figure 1.).

unpack ASEM-51

Figure 1.

2. Unpack MCUFILES into a directory (see Figure 2). Move the *.MCU you want to C:\ASEM51\MCU (see Figure 3). Here I move the P89V51RD2.MCU only.

mcufiles

Figure 2.

move mcufiles

Figure 3.

3. Edit System Variable: Start-->right click on My Computer-->Properties. On System Properties click Advanced Tab then click Environment Variables. On System variables select Path then click Edit and append ;C:\ASEM51 in Variable value (see Figure 4).

edit System Variables

Figure 4.

4. Define ASEM51INC environment variable: On System variables (from 3) click New the fill Variable name with ASEM51INC and Variable value with C:\ASEM51\MCU (see Figure 5).

add new varible

Figure 5.

5. Click OK and close all windows.

6. You can test by typing asem in Command Shell (Start-->Run-->cmd). You should get something like this (see Figure 6).

Test ASEM51

Figure 6.

Sunday, April 1, 2007

Learning Machine Code with 8-bit Microcontrollers

To understand deeply in processor architecture, we have to learn the Machine Code. I decide to select the 8051 microcontroller as a microprocessor model. A microcontroller (or MCU) is a computer-on-a-chip. They integrate many modules on one chip such as RAM, Flash memory, EEPROM, serial ports (UARTs), I²C, Serial Peripheral Interface (SPI), analog-to-digital converters (ADC), clock generator (XTAL) and more.

Humans almost never write programs directly in machine code. Instead, they use a programming language which is translated by the computer into machine code. The simplest kind of programming language is assembly language which usually has a one-to-one correspondence with the resulting machine code instructions but allows the use of mnemonics (ASCII strings) for the "op codes" (the part of the instruction which encodes the basic type of operation to perform) and names for locations in the program (branch labels) and for variables and constants.

Installing ASEM-51

ASEM-51 is a two-pass macro assembler for the Intel MCS-51 family of microcontrollers. It is running on the PC under MS-DOS, Windows and Linux. The ASEM-51 assembly language is based on the standard Intel syntax, and implements conditional assembly, macros, and include file processing. The assembler can output object code in Intel-HEX or Intel OMF-51 format as well as a detailed list file. The ASEM-51 package includes support for more than 180 8051 derivatives, a bootstrap program for MCS-51 target boards, and documentation in ASCII and HTML format. And it is free ...

The simplest way of installing ASEM-51 is copying all files of the package to your working directory, and enjoy the benefits of true plug-and-play compatibility!. Alternatively, I have set it up on Windows XP manually:

  • Downloads the lastest ASEM-51 for DOS/Windows (currently v1.3)

  • Create a new, empty directory on your harddisk (C:\ASEM51).

  • Unpack your ASEM-51 distribution archive into this directory, or copy all files of the ASEM-51 package into it.

  • Make the scratch directory default, run the batch file INSTALL.BAT provided, and follow the instructions.

  • Reboot your PC.


You can update MPU file by downloading http://plit.de/asem-51/mcufiles.zip.

References

Tuesday, March 27, 2007

Understanding Processor Architecture: Simplify Computer Complexity

Computers are complex systems. We study computer systems by using layers of abstraction. We use a hierarchical structure to simplify the management. Each level of management filters out unnecessary details on the lower levels and presents only an abstracted version to the higher-level management.

People can look at computer systems from several different perspectives depending on the type of their interaction. We use the concept of abstraction to look at only the details that are necessary from a particular viewpoint. For example, a computer user interacts with the system through an application program. Suppose you are interested in browsing the Internet. Your obvious choice is to interact with the system through a Web browser such as the Fire fox (FF) or Internet Explorer (IE). On the other hand, if you are a computer architect, you are interested in the internal details that do not interest a normal user of the system.

From the programmer’s viewpoint, there exists a hierarchy from low-level languages to high-level languages (see Figure 1). At the lowest level, we have the machine language that is the language understood by the machine hardware. Because digital computers use 0 and 1 as their alphabet, machine language naturally uses 1s and 0s to encode the instructions. One level up, there is the assembly language as shown in Figure 1. Assembly language does not use 1s and 0s; instead, it uses mnemonics to express the instructions. Assembly language is closely related to the machine language.

computer abstraction layersFigure 1. Abstract layers of Computer Systems

References

  • Guide to RISC Processors for Programmers and Engineers by Sivarama P. Dandamudi, Springer (2005), ISBN 0-387-21017-2.


Monday, March 26, 2007

Understanding Processor Architecture: ISA

A programmer uses the Instruction Set Architecture (ISA) as an abstraction to understand the processor’s internal details. This abstraction suits us very well as we are interested in the logical details of the processor without getting bogged down by the myriad implementation details.

The ISA specifies how a processor functions: what instructions it executes and what interpretation is given to these instructions. If these specifications are precise, they give freedom to various chip manufacturers to implement physical designs that look functionally the same at the ISA level. Thus, if we run the same program on these different implementations, we still get the same results. For example, the Intel 32-bit ISA (IA-32) has several implementations including the Pentium processors, cheaper Celeron processors, high-performance Xeon processors, and so on.

The ISA-level abstraction provides a common platform to execute programs. If a program is written in C, a compiler translates it into the equivalent machine language program that can run on the ISA-level logical processor. Similarly, if you write your program in FORTRAN, use a FORTRAN compiler to generate code that can execute on the ISA-level logical processor.

References

  • Guide to RISC Processors for Programmers and Engineers by Sivarama P. Dandamudi, Springer (2005), ISBN 0-387-21017-2.


Thursday, January 25, 2007

OpenServo

OpenServo is an open community-based project started by Mike Thompson with the goal of creating a low-cost digital servo for robotics. The hardware and software design of the OpenServo is free for anyone to use and modify to meet their particular needs. It is currently being developed by a small group of dedicated individuals striving to maintain the very best in free, open source software and standards. We hope that you will find the OpenServo project interesting and become a member of our community.

The OpenServo is a combination of hardware and software meant to replace the original PCB internal to low-cost analog RC servos such as the Futaba S3003 or HiTec HS-311


Some features of the OpenServo include:

  • High performance AVR 8-bit microcontroller

  • Compact H-Bridge implemented with low-cost MOSFET drivers

  • I2C/TWI based interface for control and feedback

  • Control over servo position and speed

  • Feedback of servo position, speed, voltage and power consumption

  • EEPROM storage of servo configuration information

  • Software written in C using free development tools

  • I2C/TWI based bootloader and Windows GUI programmer

  • Total cost about $20 per servo in quantity ($10 servo hardware + $10 parts)

Information can be found on this site regarding Hardware, Software and Tools & Utilities to create your own OpenServo.

Home page: http://openservo.com/

Tuesday, January 23, 2007

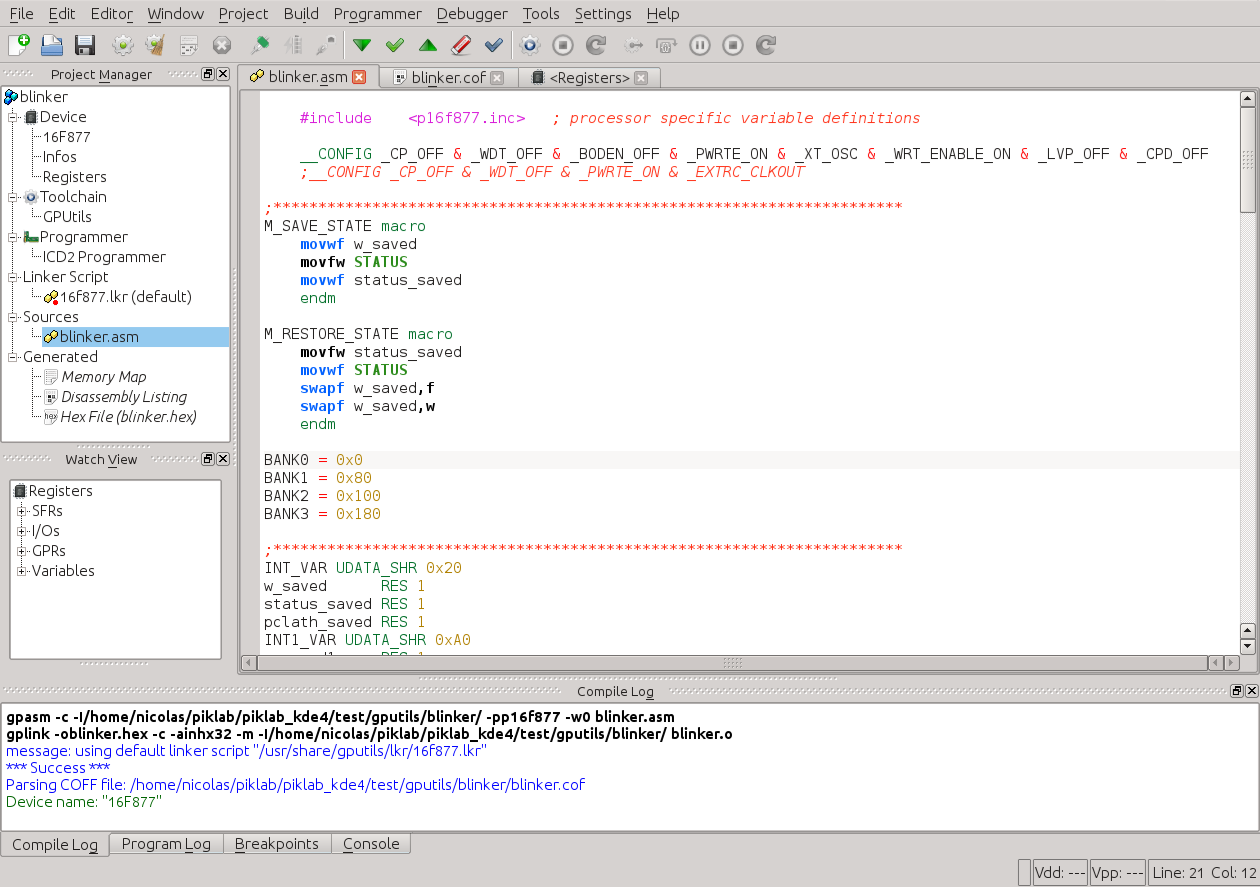
Piklab IDE for PIC and dsPIC microcontrollers

Piklab is an integrated development environment for applications based on Microchip PIC and dsPIC microcontrollers similar to the MPLAB environment. Support for several compiler and assembler toolchains, programmers, debuggers and simulators is integrated. A command-line programmer and debugger is also available.


Piklab home: http://piklab.sourceforge.net/